1999 C280 Sport has original OEM (Original Equipment Manufacture) 'factory' HID Xenon,
1999 C43 AMG had OEM Halogen Low Beams upgraded using VVME HID Upgrade Kit (H7 4300K).
For those with access to Club202.com, here is a related discussion, and more on BenzWorld.org, and MBWorld.org.
Photos taken with a Panasonic DMC-TZ1 - not all photos are consecutive numbers
(Click on any photo to view in 800x600 resolution)
287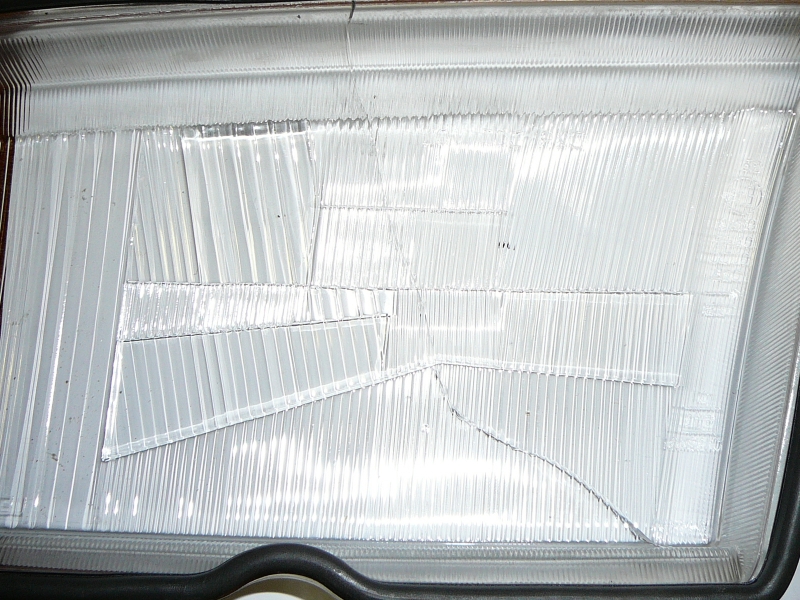 Xenon Lens (cracked) Notice the different beam pattern moldings between Xenon and Halogen |
289 C280 Fog Lights (in headlamp housing below Low Beams) |
290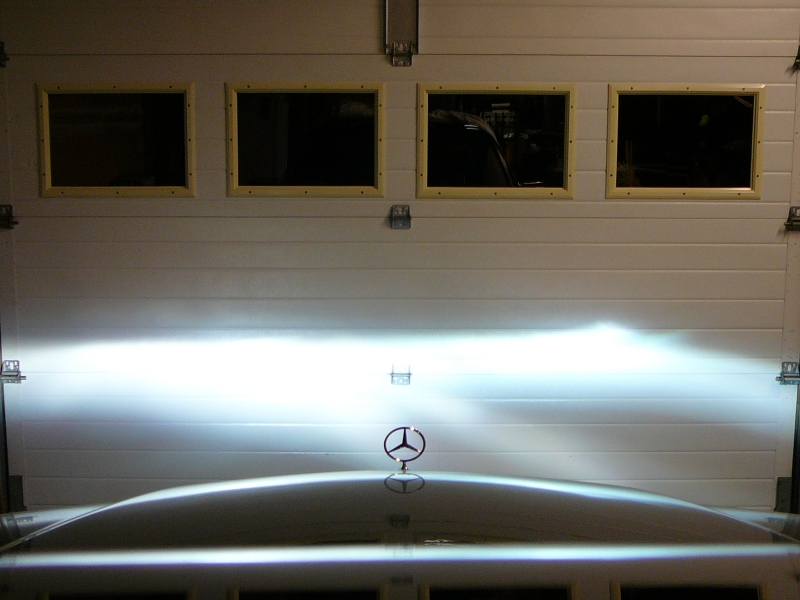 OEM (factory) Xenon Low Beams |
431 A large 4 MB QuickTime video is available here that shows parking lights turning on, then OEM Xenon Low Beams and their self-leveling function. |
291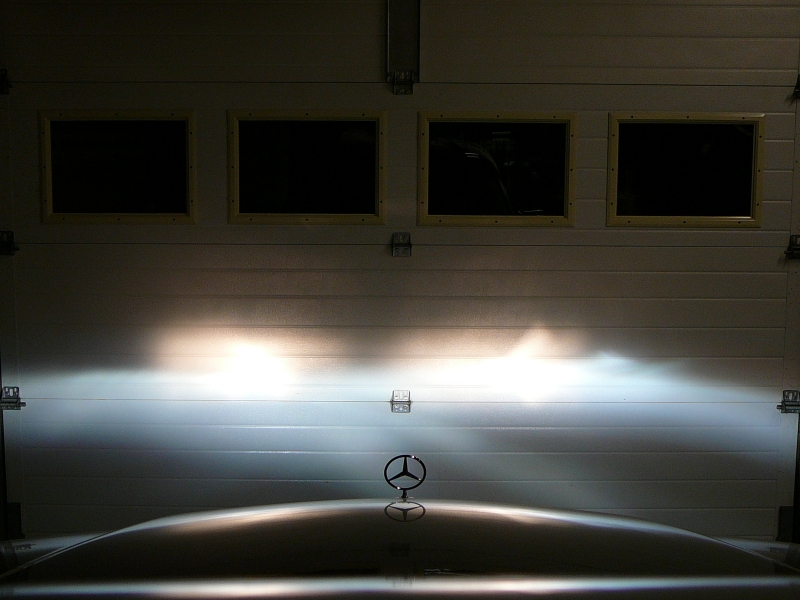 OEM Xenon Low Beams & Halogen High Beams |
286 Halogen Lens (cracked) |
296 C43 Fog Lights (in lower bumper, lenses quite pitted) |
297 OEM Halogen Low Beams |
298 OEM Halogen Low Beams & Halogen High Beams |
302 Clear Corners with 2357A Filament Bulbs |
303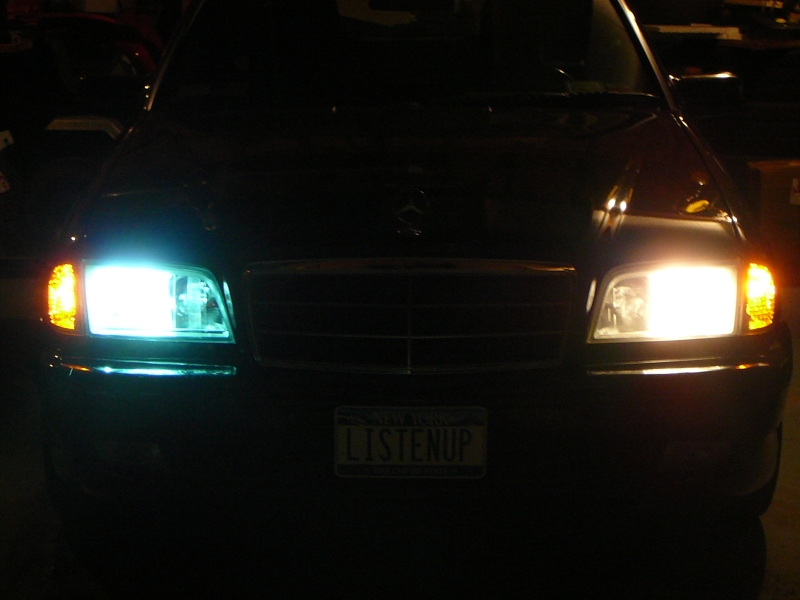 VVME HID Xenon H7 Lamp (cold) on left side (car's right side) & Lens replaced with M-B Xenon Lens. OEM Halogen still on right (car's left/driver's side)side. |
305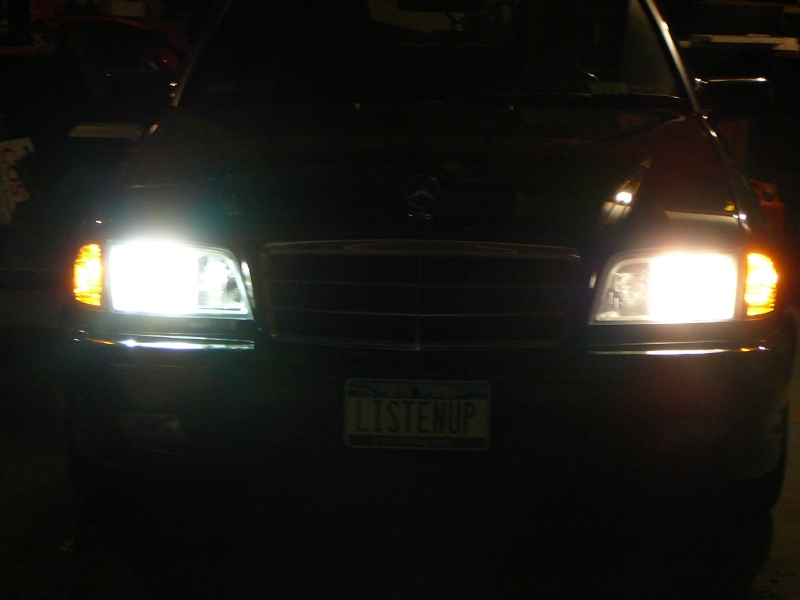 Xenon (on left side, car's right side) warmed up, viewed from above beam |
306 viewed from near beam level |
304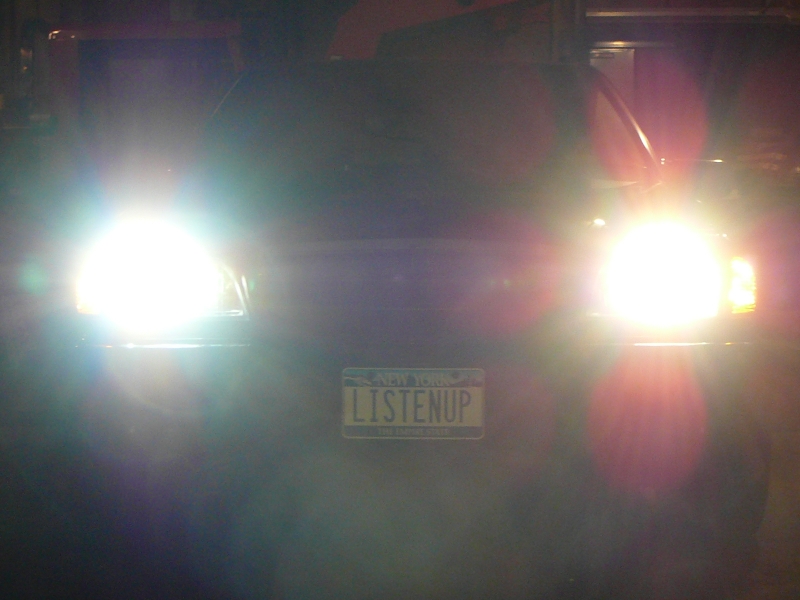 viewed from head-on beam |
307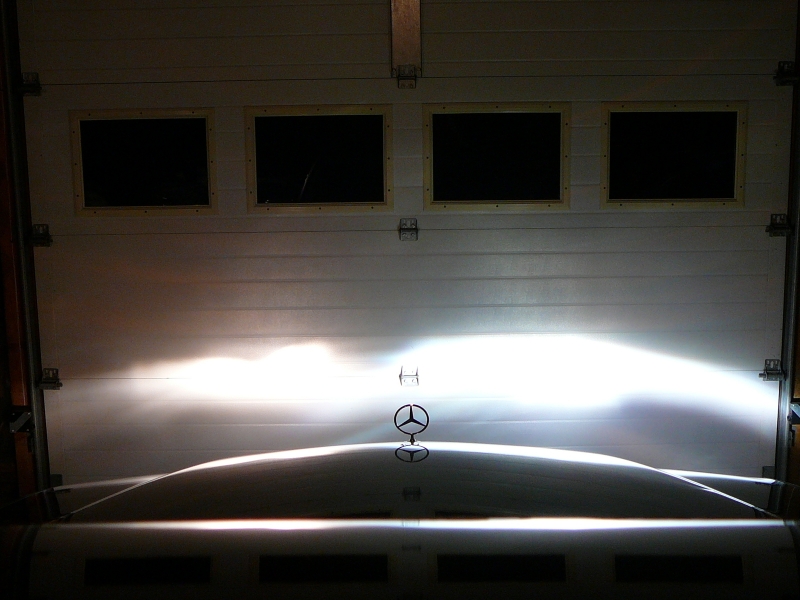 last view of Halogen on left side (VVME Xenon on right side) |
308 VVME Xenon H7 bulbs in both sides, Halogen lens still on left side. (Compare to 316 for Xenon lenses on both sides.) |
309 viewed from near beam level Xenon lens on left, Halogen lens on right |
310 viewed from head-on beam |
311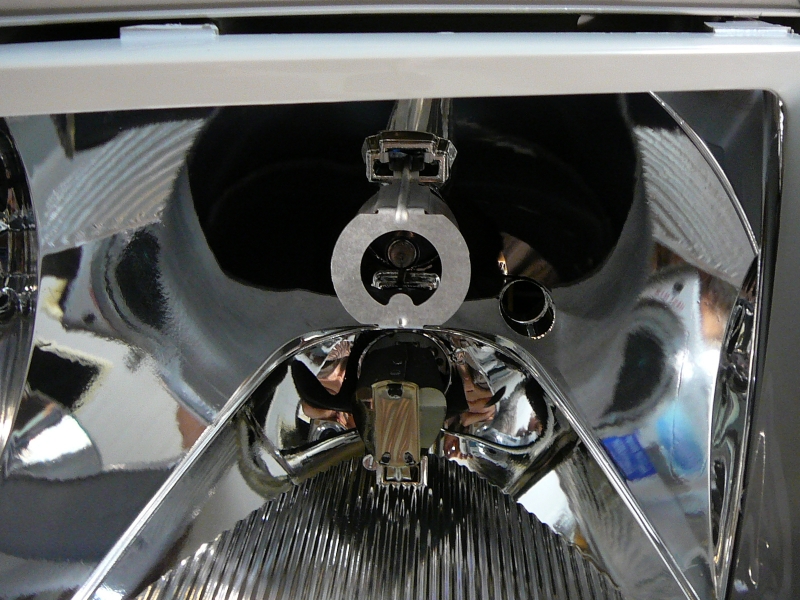 lens removed, Xenon bulb visible in upper portion, (unused fog lamp below) |
315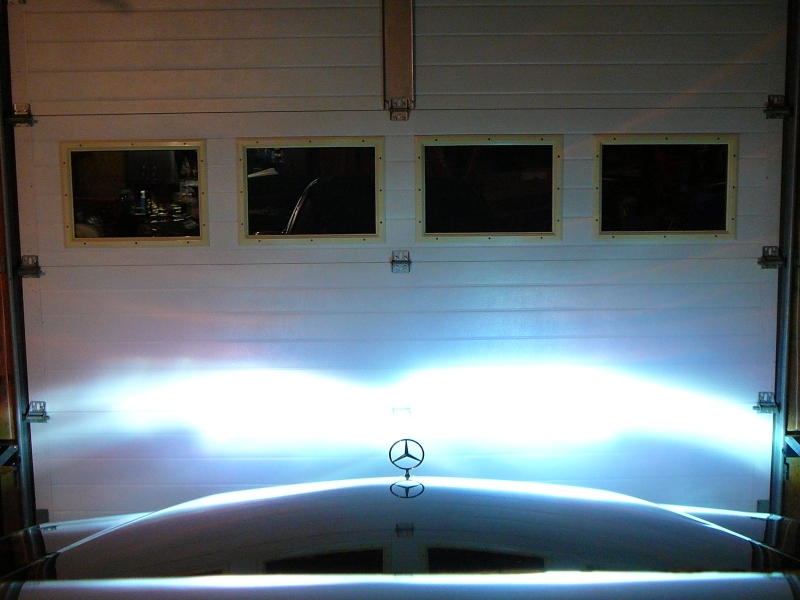 VVME Xenon H7 bulbs just turned on. Very blue during first few seconds |
314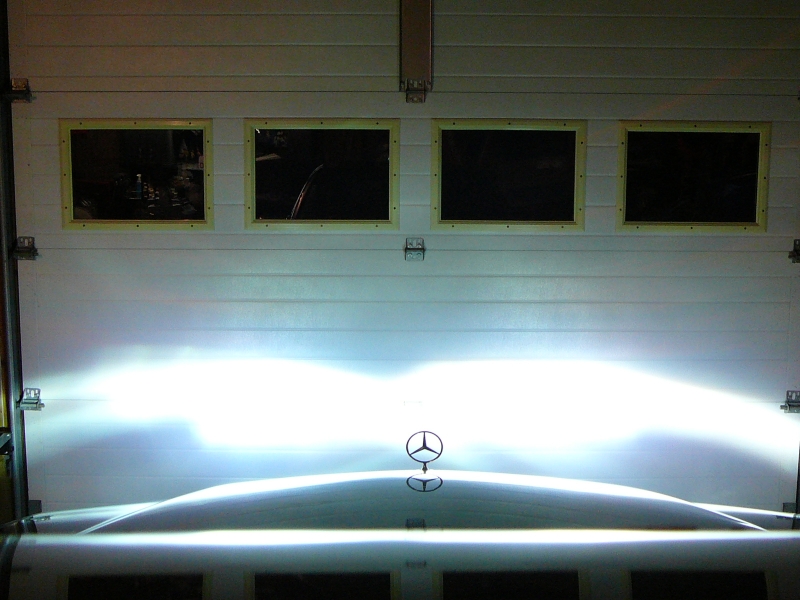 VVME Xenon H7 bulbs in both sides, new OEM Xenon lenses now on both sides. (Low Beams only) |
316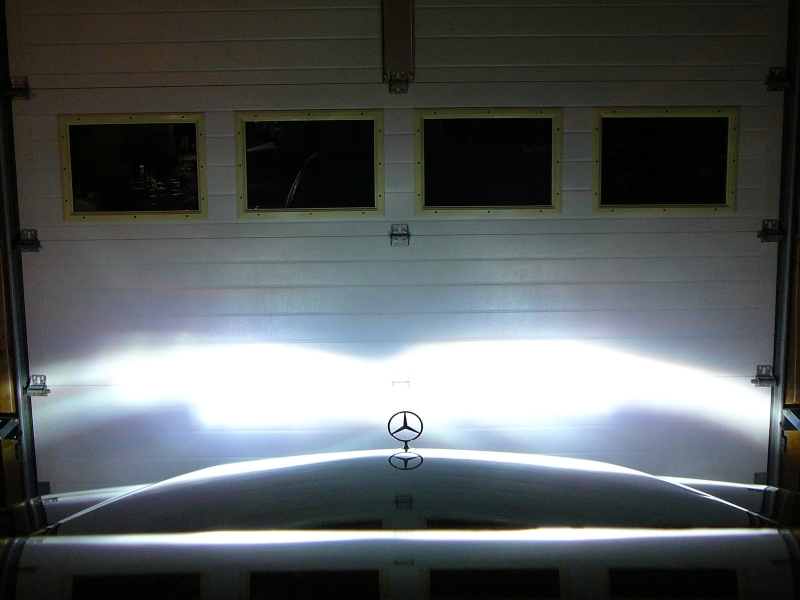 VVME Xenon H7 bulbs warmed up, Xenon lenses on both sides. (Compare to 308 with Halogen lens on LH side.) |
317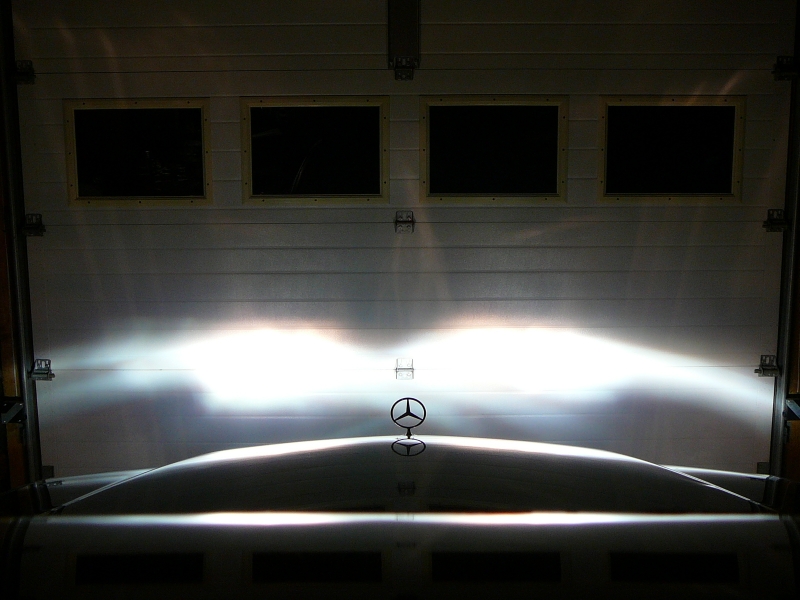 VVME Xenon H7 Low Beams, and OEM Halogen High Beams. The Xenons outshine the Halogens by far! |
318 Halogen High Beams only (without Low Beams) |
319 Halogen Lens (Stone chips from 100,000 miles of use.) |
324 VVME Xenon Low Beams only through OEM Xenon Lenses from about 10' away |
325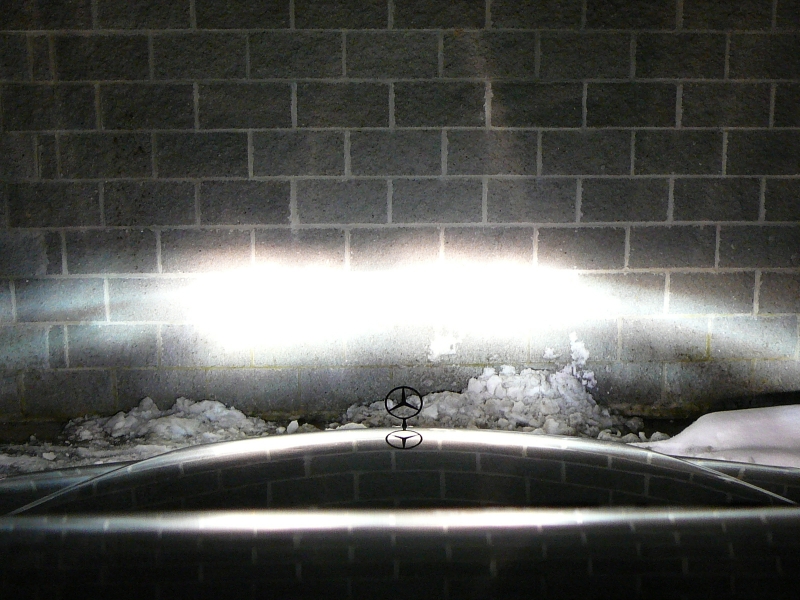 VVME Xenon Low Beams and Halogen High Beams through OEM Xenon Lenses from about 10' away |
326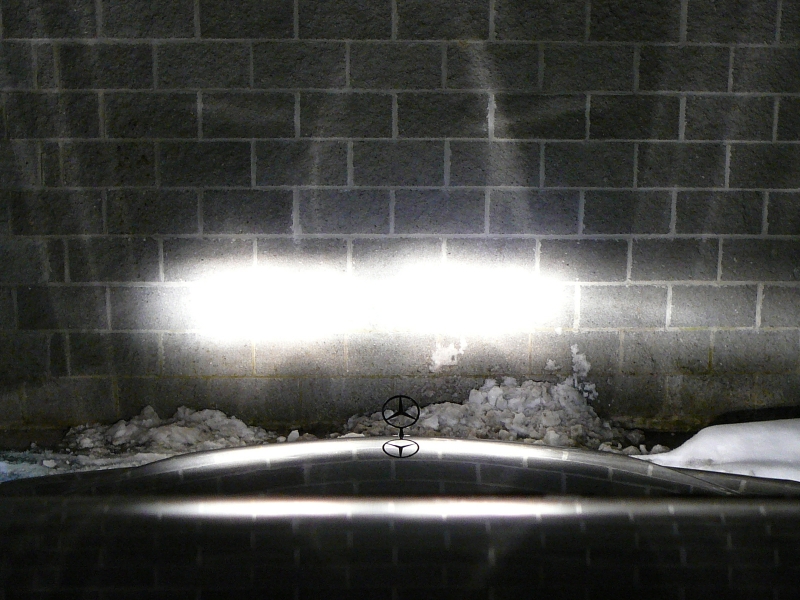 Halogen High Beams only through OEM Xenon Lenses from about 10' away |
330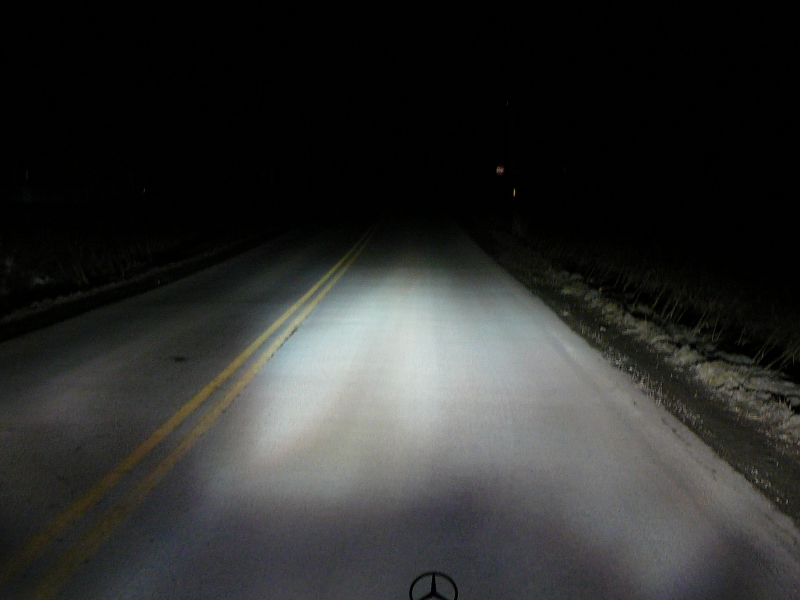 VVME Xenon Low Beams only through OEM Xenon Lenses (Slow Shutter setting 1/8-) |
331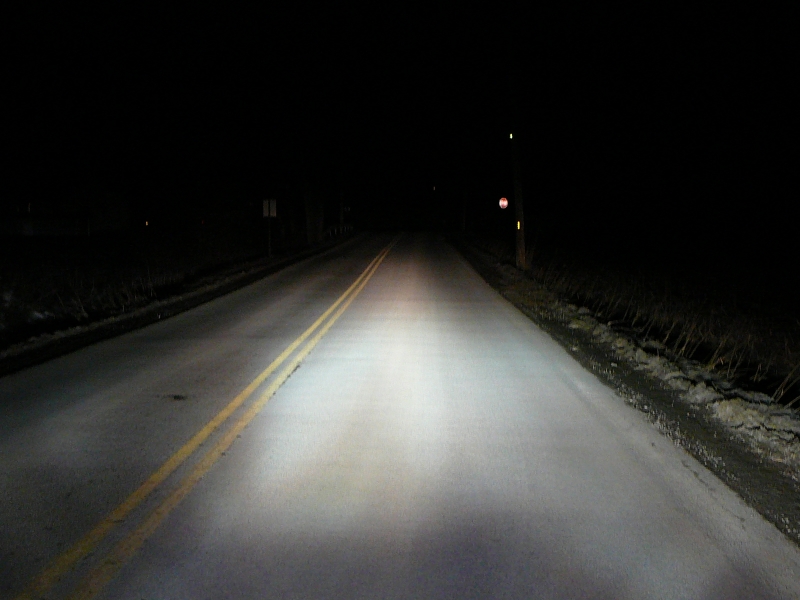 VVME Xenon Low Beams and High Beams through OEM Xenon Lenses (Slow Shutter setting 1/8-) |
327 VVME Xenon Low Beams only through OEM Xenon Lenses from about 30' away |
328 VVME Xenon Low Beams and Halogen High Beams through OEM Xenon Lenses from about 30' away |
329 Halogen High Beams only through OEM Xenon Lenses from about 30' away |
332 VVME Xenon Low Beams only through OEM Xenon Lenses (Slow Shutter setting 1/4-) |
333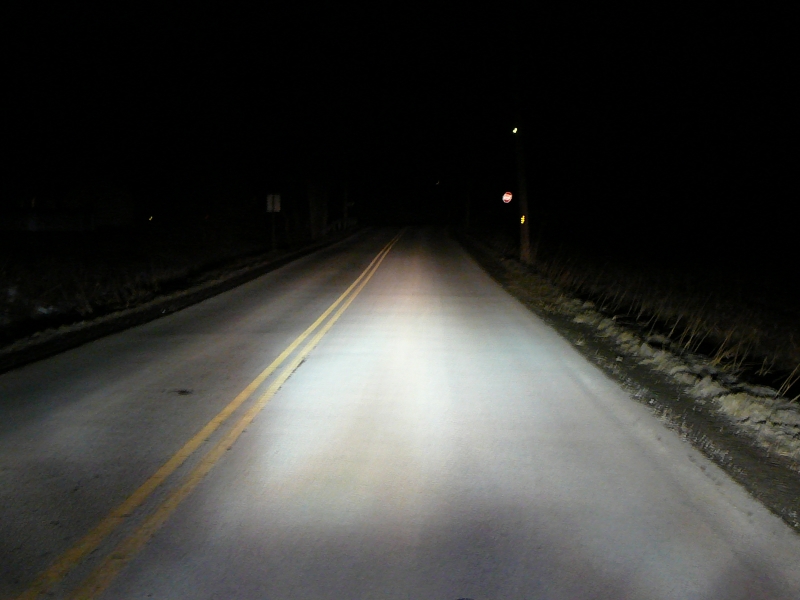 VVME Xenon Low Beams and High Beams through OEM Xenon Lenses (Slow Shutter setting 1/4-) |
the line does not appear to be as sharp or flat as the factory/OEM Xenons.
(View photos 308 and 316 to compare the OEM Halogen lens to the OEM Xenon lens.)
The Xenon Lenses are not cheap, but they DO make a noticeable improvement over the Halogen lenses when using my VVME HID kits. (I imagine that changing the housings would make a further improvement, but maybe only if the HID bulbs are the same shape. The housings/reflectors appear to be only available as a complete assembly MSRP $1390, online $1084.20 each side!!!)
202 820 57 66 Headlight Lens for Xenon LH - MSRP $222, online $173.16
202 820 58 66 Headlight Lens for Xenon RH - MSRP $222, online $173.16
My upper seals were deteriorating, so I replaced them at the same time:
202 826 11 80 Headlight upper seal LH - MSRP $52, online $40.56
202 826 12 80 Headlight upper seal RH - MSRP $52, online $40.56
My lower lenses were VERY pitted, so I replaced them before putting HIDs there also:
170 826 09 90 Lower Driving/Foglight glass lens LH - AutohausAZ $18.89
170 826 10 90 Lower Driving/Foglight glass lens LH - AutohausAZ $18.89
The 4300K HID/Xenon Low Beams and lower Driving/Fog lights are VERY nice... very White and very Bright!
The lower Driving/Fog lights are naturally aimed low, so the beam pattern isn't a problem with the original lenses. I have all the 'parking' bulbs as LEDs now, and I always turn on the LED bulbs and the lower HID driving lights, even in the day time. I even get a credit on my vehicle insurance for 'daytime driving lights'.
I upgraded the High Beams also! (But after some extended night driving, I'm not sure that the HID/Xenon High Beam conversion is worth the bother. The biggest 'issue' is that the Xenons take a few seconds to get to full brightness (but they DO get very bright!). If you like to flash your high beams, you're probably better to stay with upgraded Halogens (such as Sylvania SilverStar) in your High Beams.) My second set (for high beams) arrived from VVME in just 2 business days! (Paid for them on Sun., Jan. 20, 2008, they arrived Wed. Jan 23.) The High Beams kit was mounted Jan. 29. The High Beams are not a "plug-n-play" as the bulb connector had to be cut and new insulated connectors crimped onto the two wires, and the hole in the housing for the bulb had to be filed a bit larger. The 10 Amp fuse for "Flash-High-Beams" and Turn Signals popped, so I replaced the 10 Amp fuse (#22) to 15 Amp. I drilled to mount 3 ballasts on each side in the cavity directly behind bumper in the cavity accessible by removing the front wheel house shields. Three ballasts on each side because I plan on upgrading the bumper mounted Fog Lamps to HID/Xenons next.
P.S. I returned my Sylvania SilverStar H1 bulbs to the High Beams for quick High Beam Flash functionality, and moved the HID H1 bulbs to the lower C43 Driving/Fog Light fixtures. I like using my Driving/Fog Lights at all times, even during the day time as Day Time Driving Lights, and the HID bulbs are a VERY NICE improvement over the original Halogen Driving Lights!!!
Here are pictures taken when installing the High Beams, and mounting ballasts.
354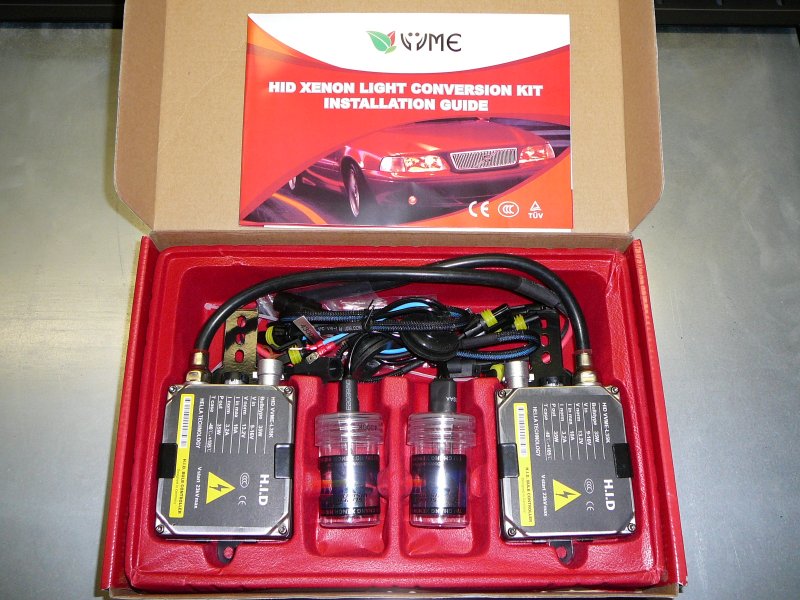 The 2nd VVME kit. This one contains H1 bulbs for High Beams. |
357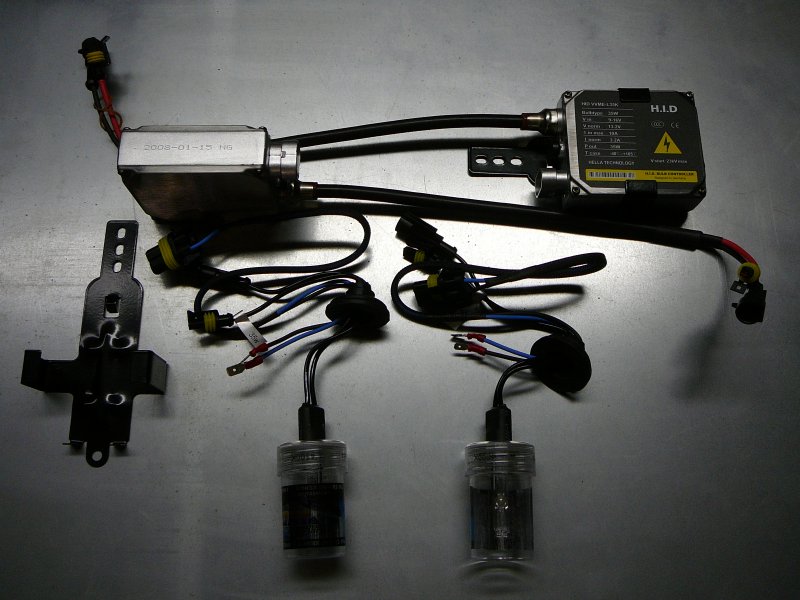 I slid a bracket off of one ballast in order to see the date code. This kit is dated Jan.15 2008. They were shipped on Jan.21 - not yet a week old! |
362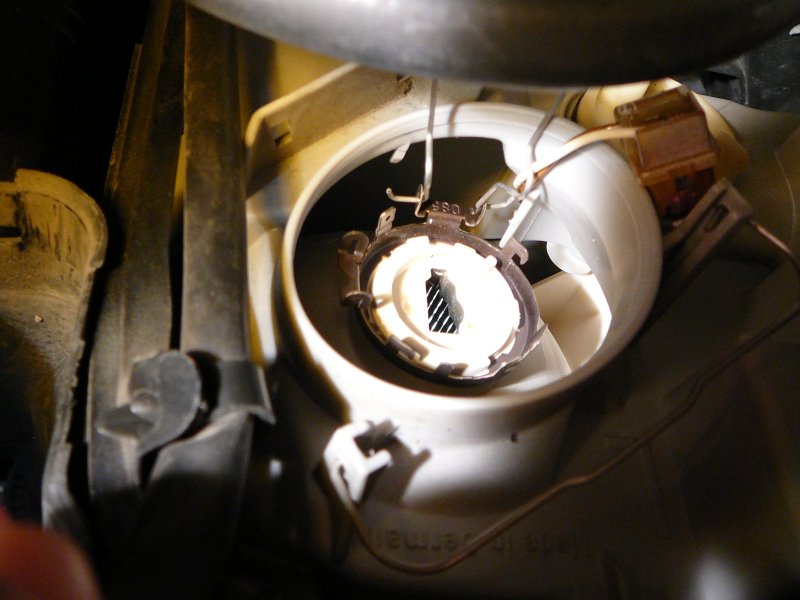 A rear view of a High Beam socket. The hole will need to be enlarged a bit to make room for the bulb. I removed the front lens, and used a round file and the filed side is visible in photo 394 |
363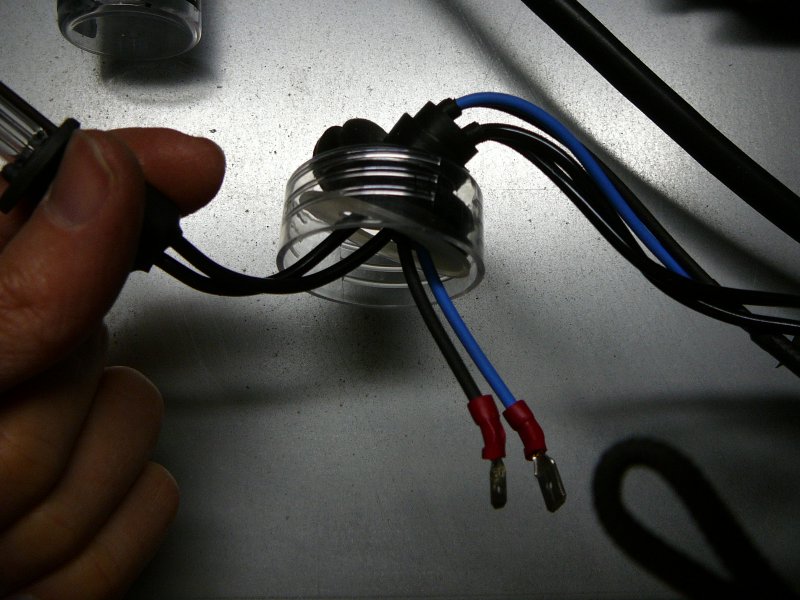 Pass the rubber grommet through the plastic can's cap. I used a 'tin snip' to slit the flat plastic washer because it would not pass over the plug. |
364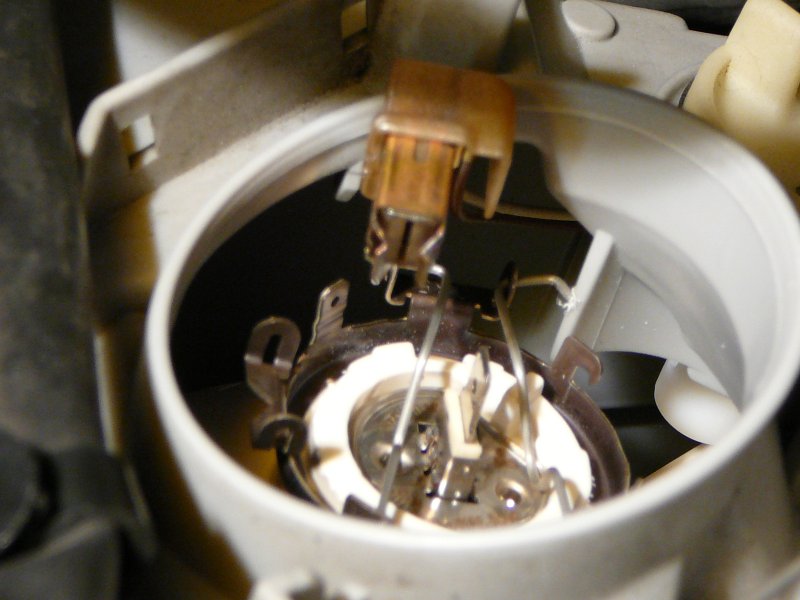 High Beam halogen bulb and its connector. This special connector snaps onto the sides of the H1 bulb for ground because the bulb is isolated from the metal ring that has a ground spade by the plastic reflector housing. |
365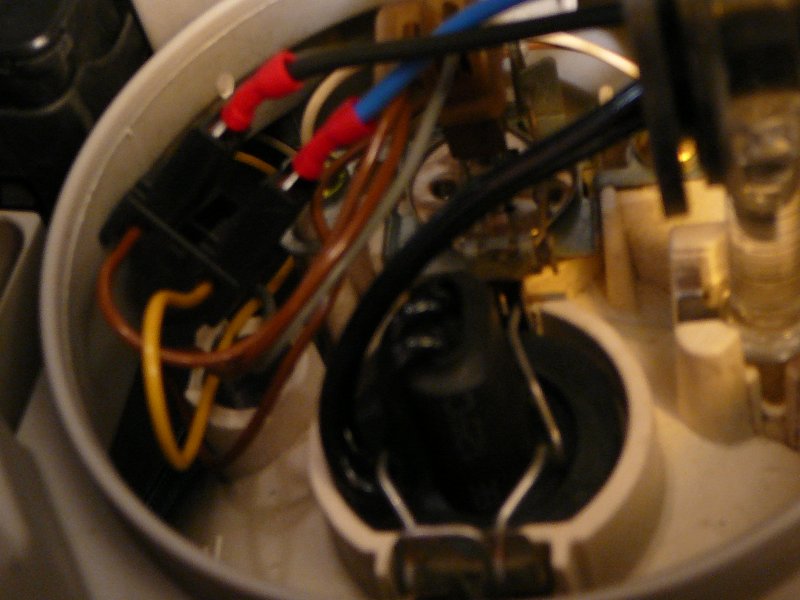 Looking upside-down into the Low Beam housing. The C43's unused fog lamp bulb is visible toward the top of the photo. The black wire from the HID kit connects to the brown wire at the H7 socket. The blue wire connects to the power side of the H7 socket. |
368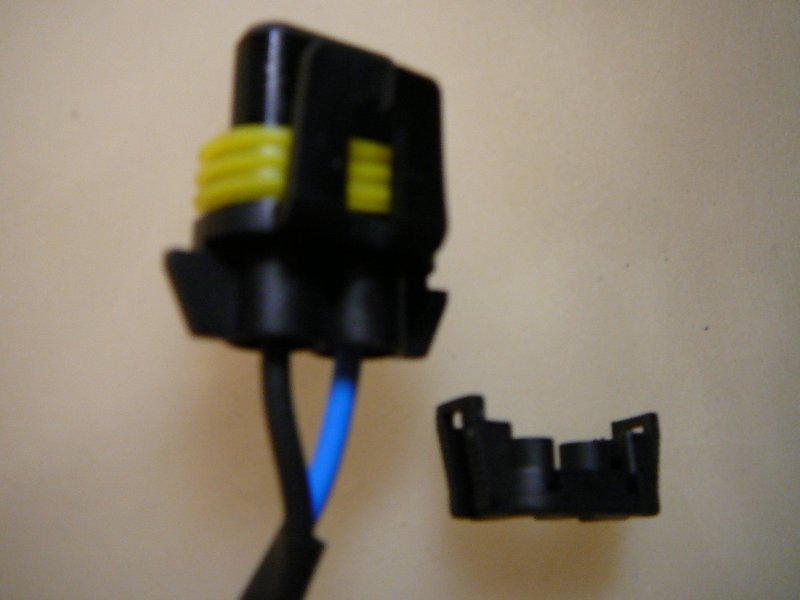 I snapped off the retaining clip before threading the HID kit's double wire connector through the 1" hole drilled into the Dust Cover. |
369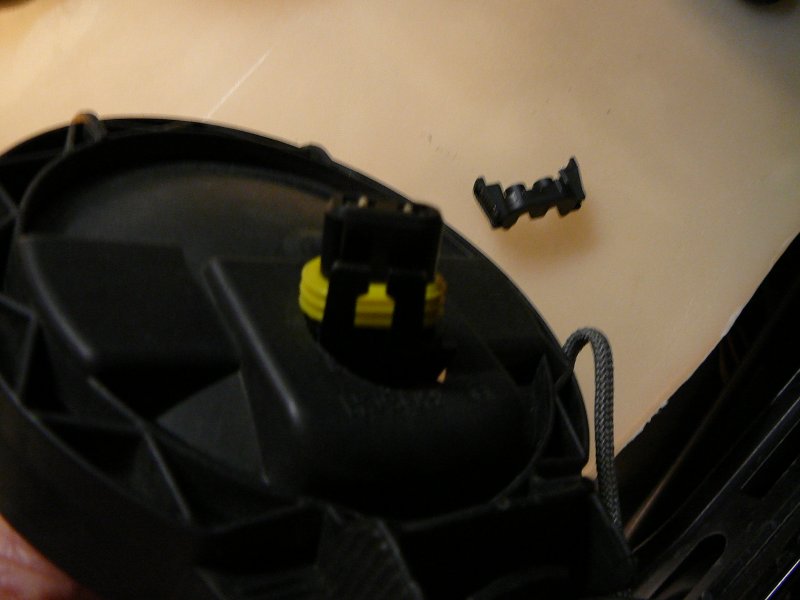 It's a tight squeeze to get the connector through the drilled hole. |
370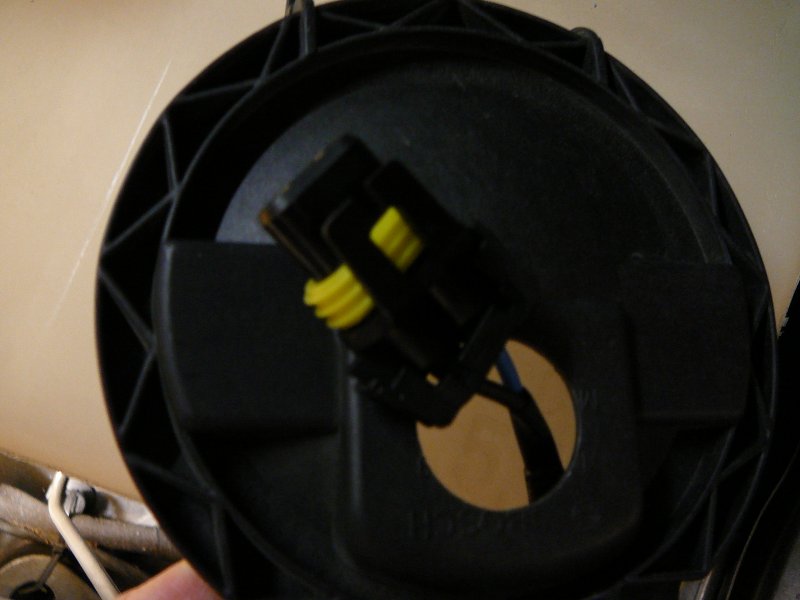 Putting the retaining ring back onto the plug. |
372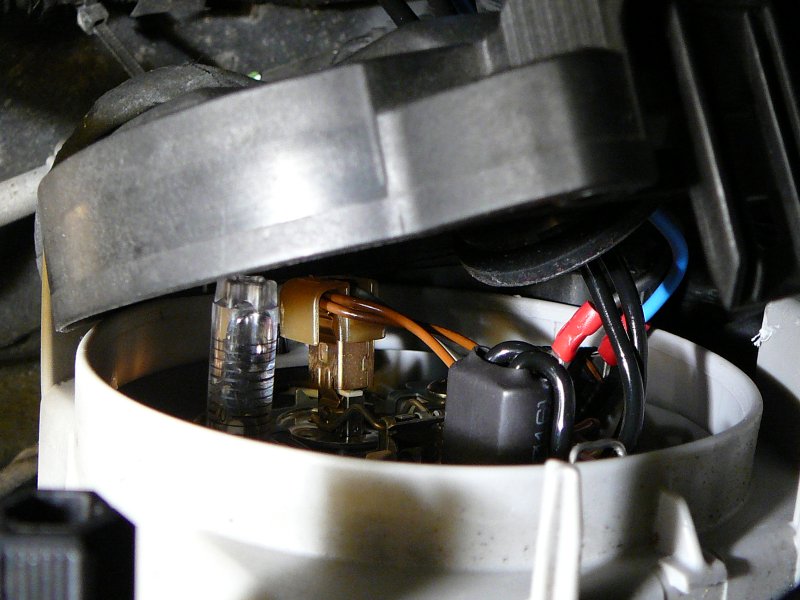 From the upper side, threading the HID kit's 4 wires and grommet through the dust cover. |
373 The grommet fits snugly into the Dust Cover's 1" hole. |
374 On the US driver's side, the dual wire cable will be threaded down through the frame rails. Low Beam (right hand) side done. Now onto the High Beam (left) side. |
380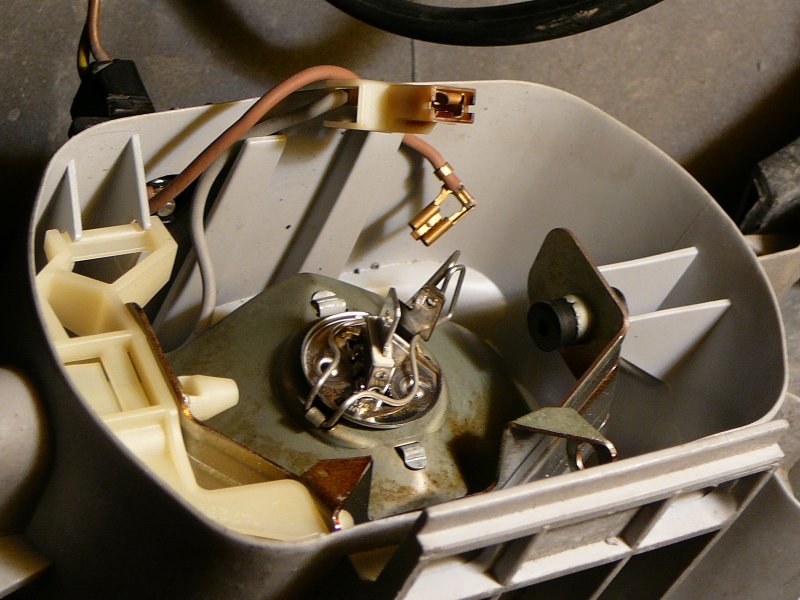 Not upgrading the C43 Fog Lamps yet, but notice that this lamp uses conventional connectors because the reflector is metal, so these H1 bulb Fog Lamps will be a 'plug-n-play' upgrade. (There is about 1-11/16" clearance for the bulb and the 'light cap' which will need to be removed if the bulb is longer than this length.) |
383 From the front/lens side of the LH/US driver's side, notice that the previously flat left side of the bulb hole has been filed to allow the fatter Xenon bulb. |
382 The bulb retaining wire is visible through the bulb hole. |
394 Xenon bulbs in Low Beam and High Beam positions viewed from the front without the lens. The hole for the High Beam on the left has been enlarged with a round file. |
384 Xenon bulb is mounted in the High Beam housing. Original Connector is visible and the different size spade connectors of the HID kit. Ground side gets the narrow spade connector. |
388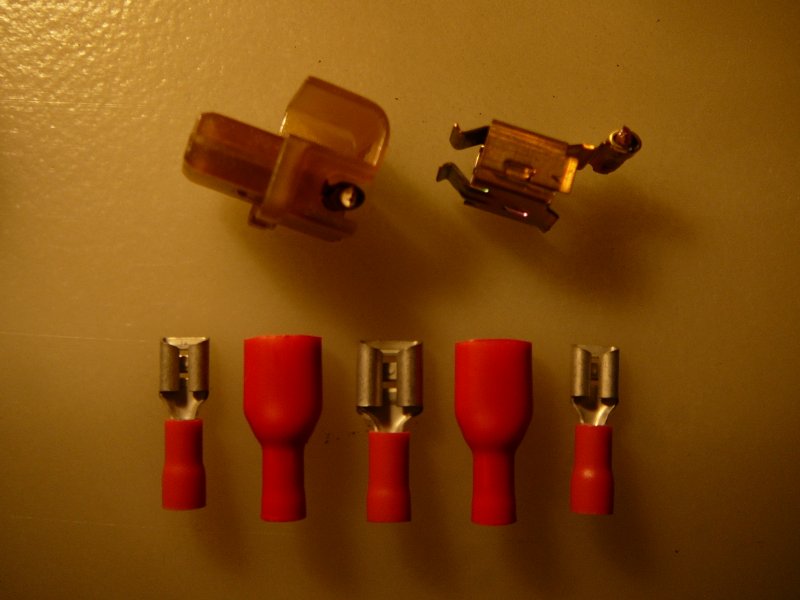 I disassembled the High Beam connector and cut each wire very close to the crimp to retain as much wire length as possible for the new connectors. Ground side gets the narrow connectors. Power side gets the insulated connectors. (The two insulated connectors have the same wider connector as in the center.) |
392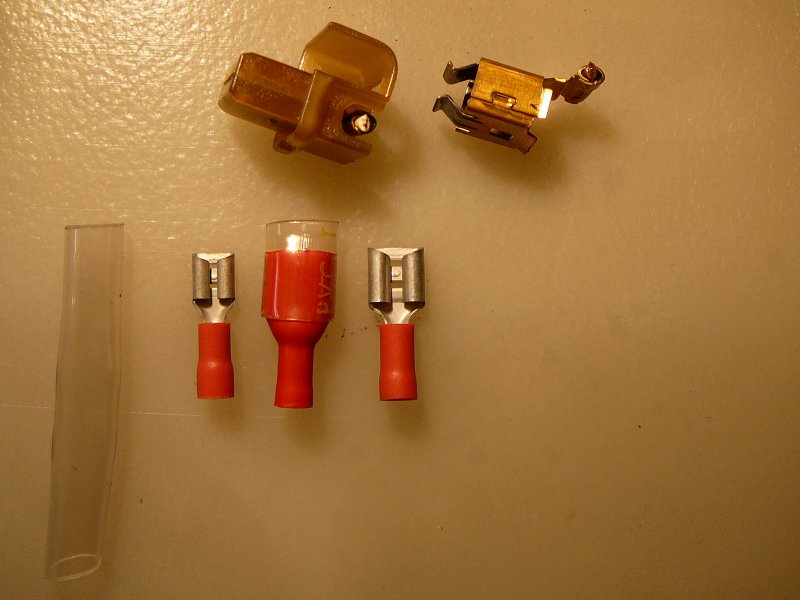 I added an insulating sleeve (it's clear) to the power side to prevent short-circuits as the cable floats around in the housing. |
390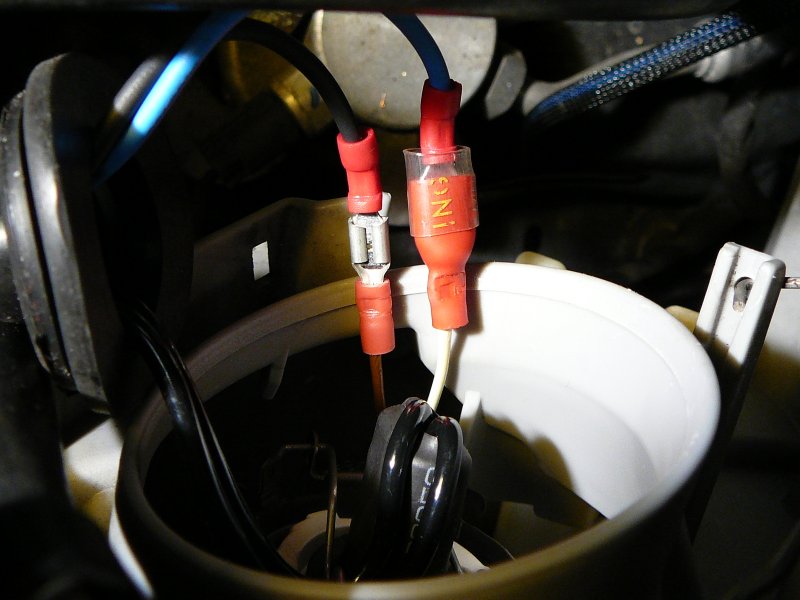 The original brown ground wire is connected to the narrow connector on the HID kit's black wire. The HID kit's blue wire connects to the original power wire with the new extra insulated connector. |
391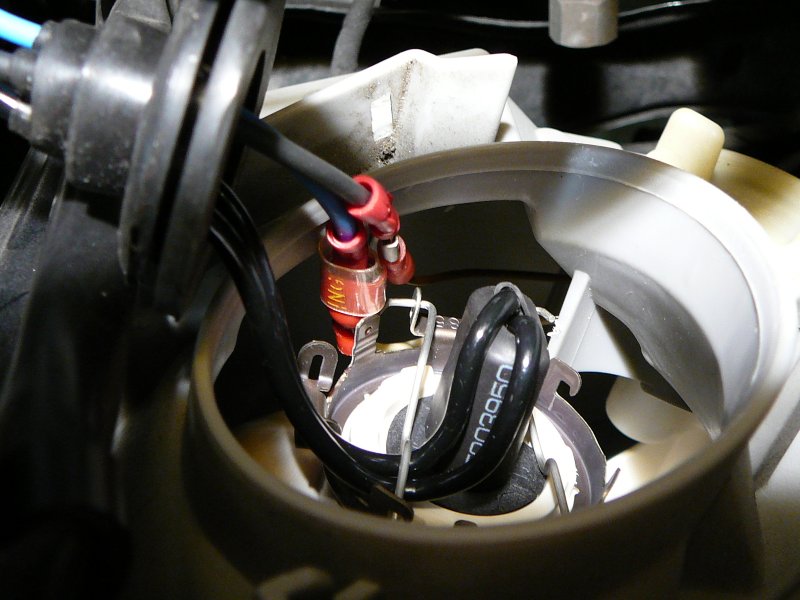 Last view before the High Beam's 4 wires and grommet are passed through the Dust Cover. |
402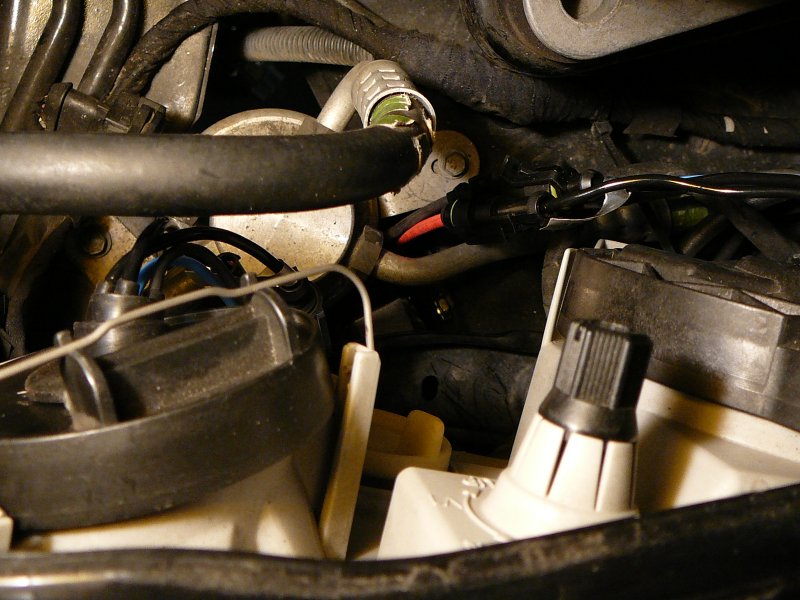 Both Low and High Beam bulbs (LH/US driver's side) are installed and cables threaded down through tight openings. |
434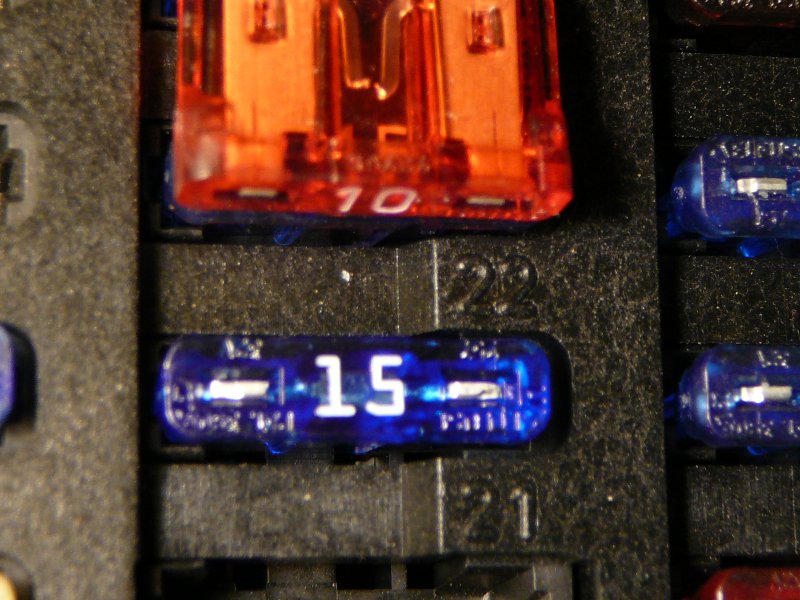 Replace Engine Compartment 10 Amp Fuse # 22 with a 15 Amp Fuse (Otherwise High Beam Flash (pull lever) will blow the 10 AMP fuse, and you won't have turn signals either. Steady High Beams (push lever) uses different fuses.) |
397 LH/US driver's side has its front wheel house shield removed. Bumper is also off. The hanging bolt is sitting in an original hole in the frame bracket that I will use for 1st ballast. |
398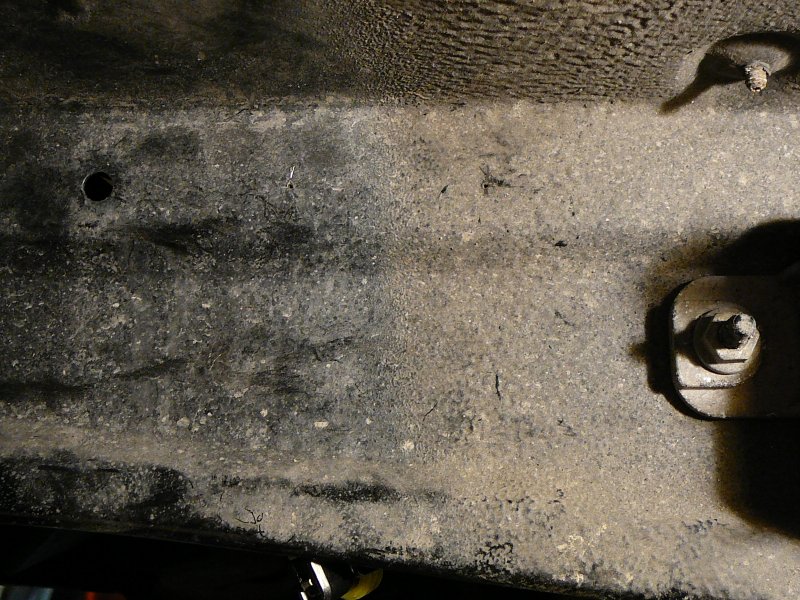 Measured and dimpled the rail to drill 2 holes to mount 2nd and 3rd ballast. |
399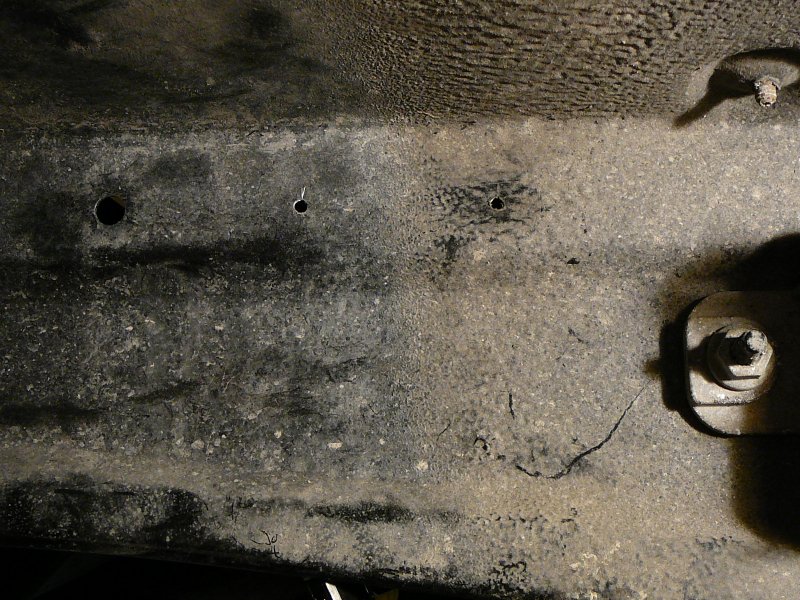 Small holes are drilled first. The RH side hold (toward the rear) is 3½" from the existing hole on the LH side. |
400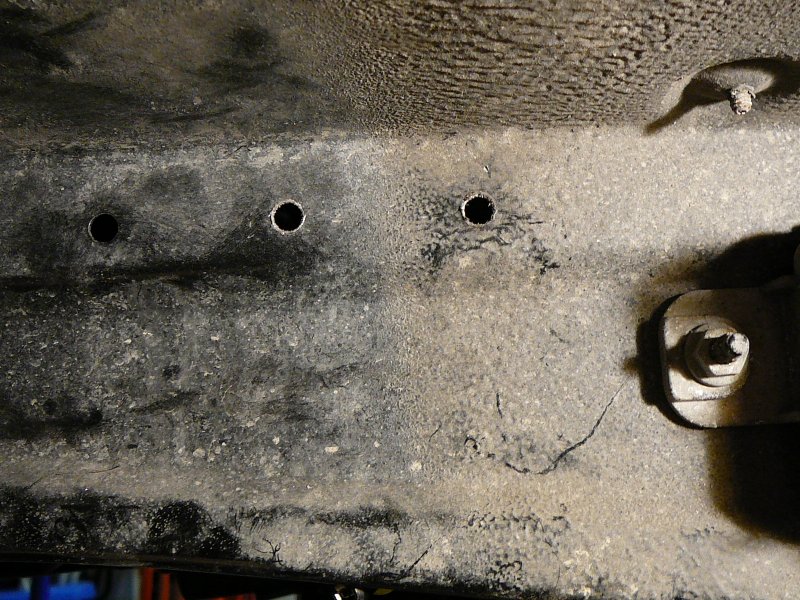 ¼" holes are completed. But I later relocated the center hole to offset the 3rd ballast further back a bit... |
401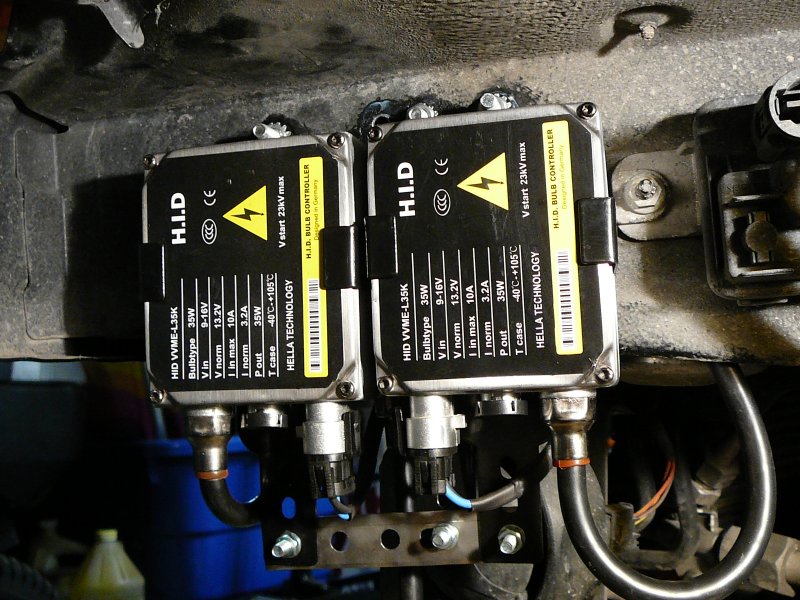 Three ballasts are mounted (for Low Beam, High Beam, Lower Fog Lamp). |
405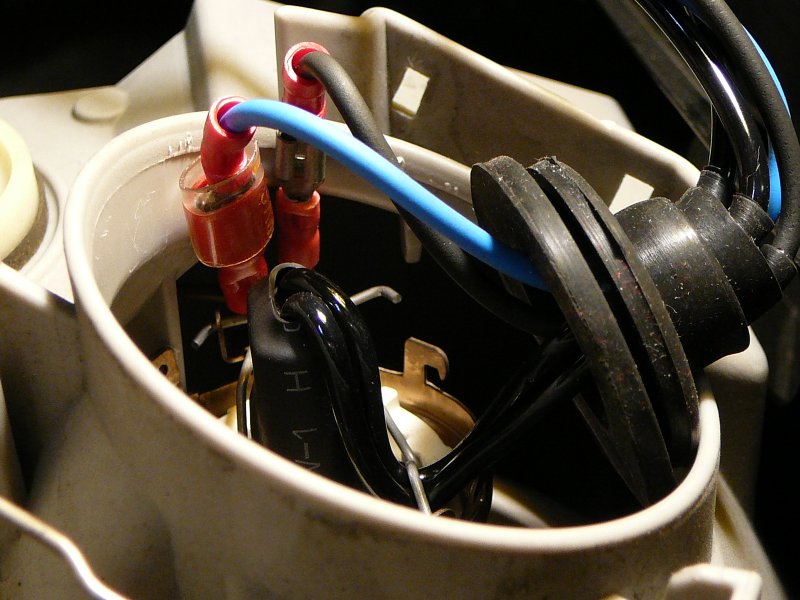 View of RH/US passenger side High Beam with new connectors mounted and ready for Dust Cover to be mounted. |
406 On RH/US passenger side, Wheelhouse Shield is removed, oil cooler visible, and small hole drilled ¾" back from the existing top hole. |
407 ¼" hole is completed. 1st and 2nd ballasts will be hung from this location (one on each side of the frame rail). |
408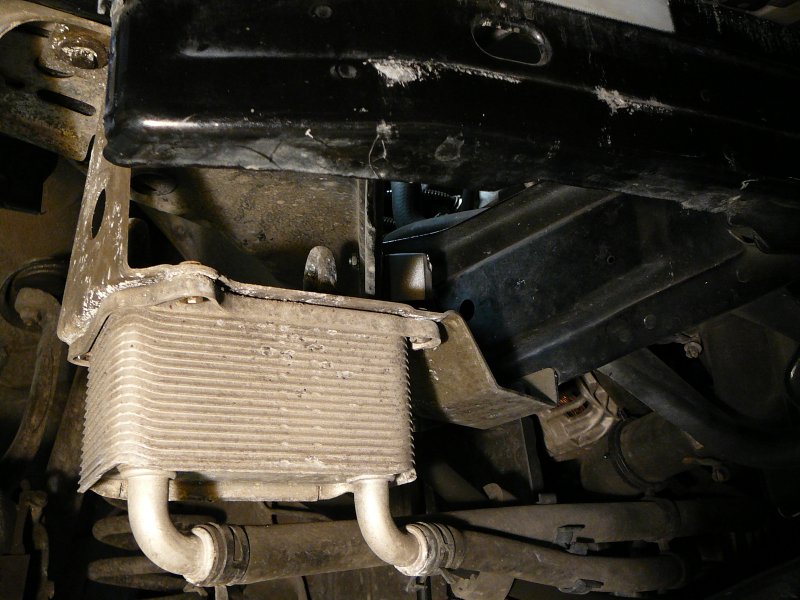 To mount the 3rd ballast on main frame rail, the oil cooler bracket will be unfastened. |
409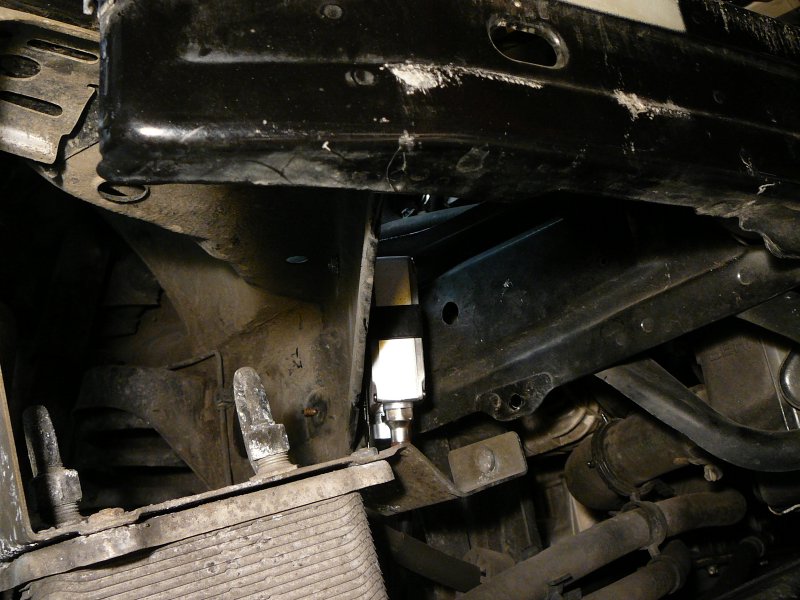 The oil cooler's bracket as been unfastened, and frame rail dimpled before drilling to mount the 3rd ballast with self-tapping screws. |
410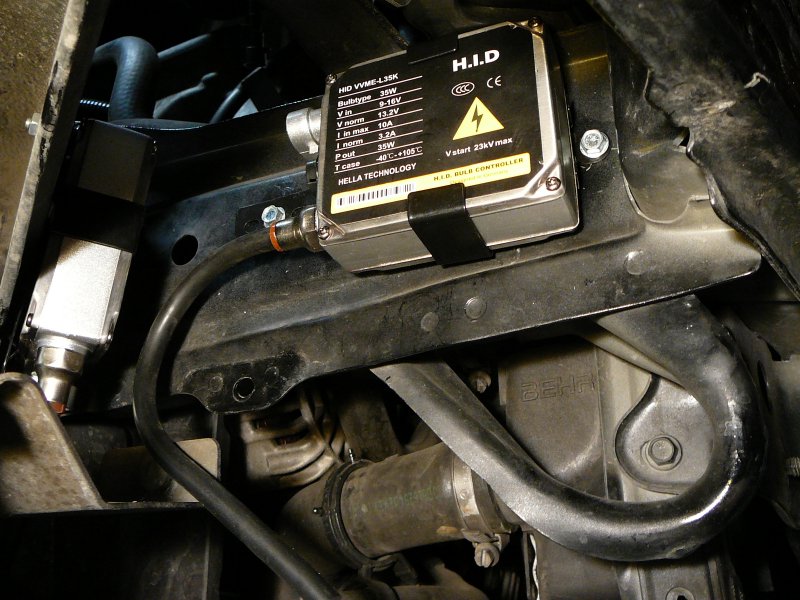 3rd ballast for C43 Fog Lamps is mounted. 2nd ballast is also visible to the left. |
411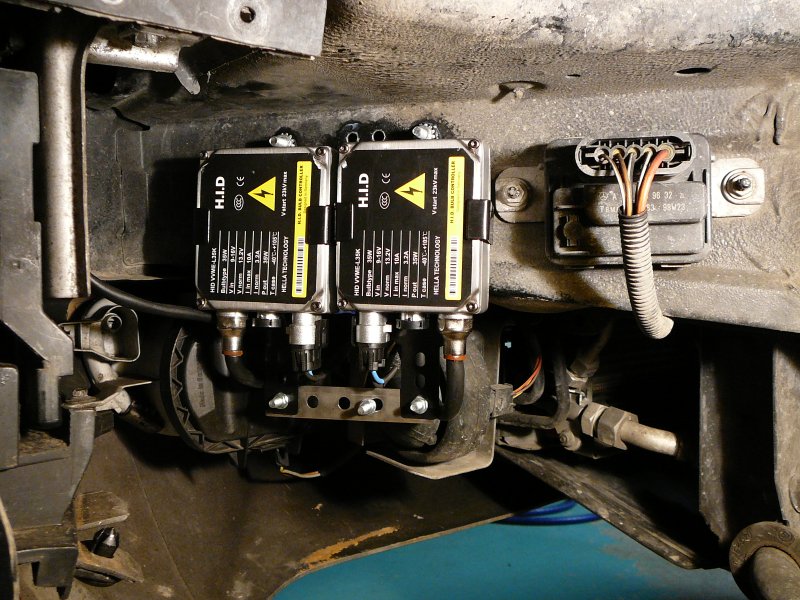 LH/US driver's side 1st and 2nd ballasts are mounted, and bumper (with not-yet-upgraded C43 Fog Lamp) is remounted. |
412 RH/US passenger's side 1st and 2nd ballasts are mounted back-to-back on the angled frame rail. Oil Cooler bracket and Front Bumper are remounted. |
415 Clear Corners with Amber Parking Lamps only. |
414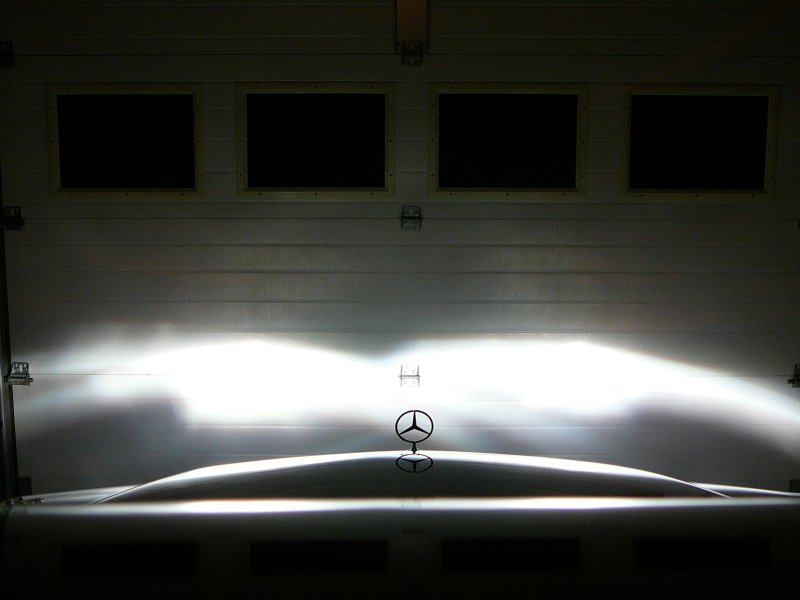 Xenon/HID kit's Low Beams only. While the OEM housings were Halogen equipped, the Lenses have been replaced with OEM Xenon Lenses. |
413 Xenon Low Beams and High Beams. Even though I have OEM Xenon Lenses, they only had Xenon Low Beams. The OEM High Beams were halogens. |
The following details are only for reference, starting with details of the OEM HID/Xenon configuration,
443 The pin assignments of the square plug (pictured on the right) that provides power and ground to the headlamp housing:
Pin 1) Fog Lamp power
(The plug on the left is the OEM Xenon ballast to housing.)
Pin 2) Ground Pin 3) Low Beam power Pin 4) High Beam power |
439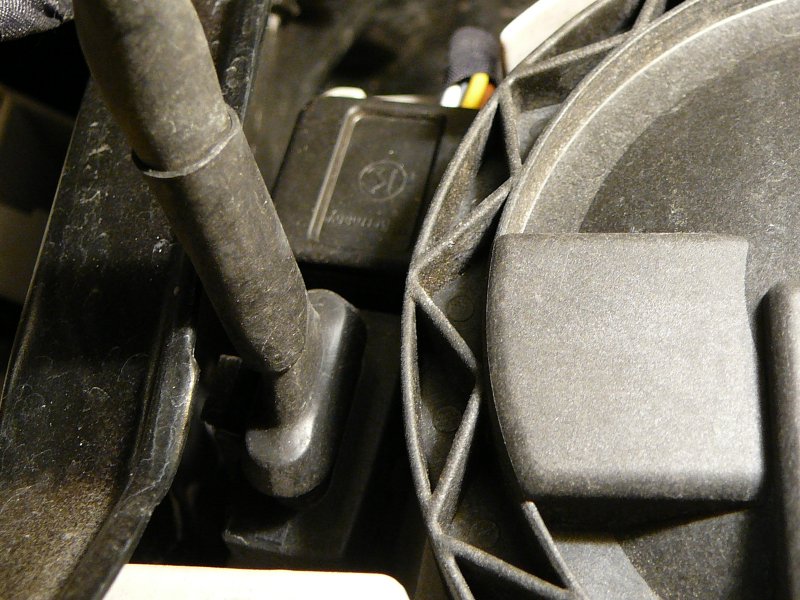 OEM Xenon housing connections. (Viewed from above looking down, so top of photo is bottom of housing.) Square plug is main connector, rectangular plug is OEM Xenon to ballast/"Control Module" cable. |
441 Similar view as in previous photo, but with Fog/Low Beam cover removed. Can see the OEM ballast at top right corner of photo, and the auto-leveling motor between the Low Beam and High Beam. (Again, we're looking down into the front, right (US passenger) side of the engine bay, so the view is upside down.) |
448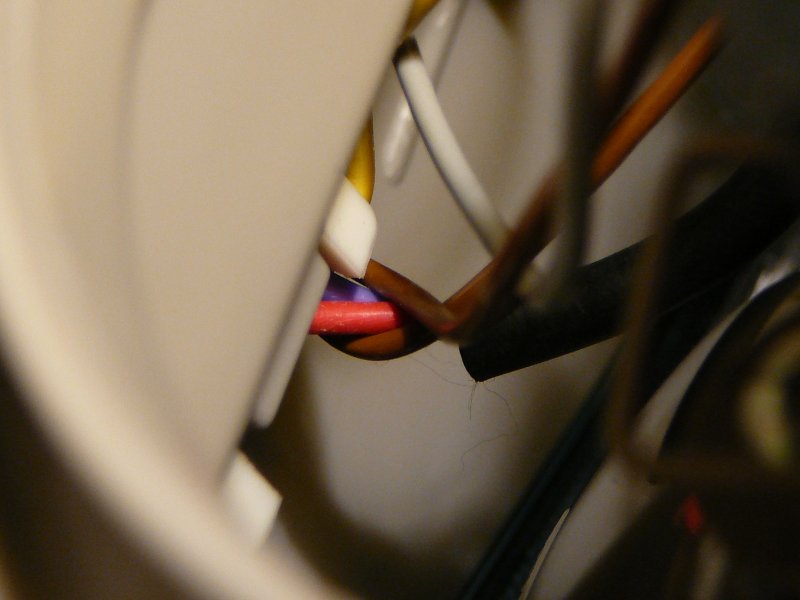 Notice Blue from supposed Pin 1, and Red from supposed Pin 2, both to igniter/Ignition module under High Beam Bulb... Not visible are the 2 wires that connect supposed Pin 3 and 4 to the square connector. Supposed pin 3 connects to the square connector pin 2 for Ground. Supposed pin 4 connects to the square connector pin 3 for Low Beam power. |
446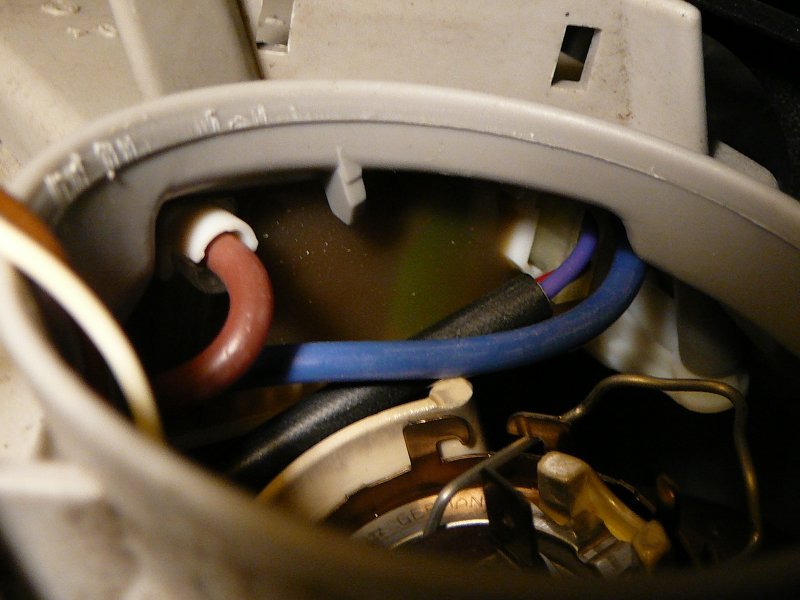 Looking under the High Beam bulb, notice Blue and Red to Igniter/Ignition Module, and large Blue and Brown from Module ... |
449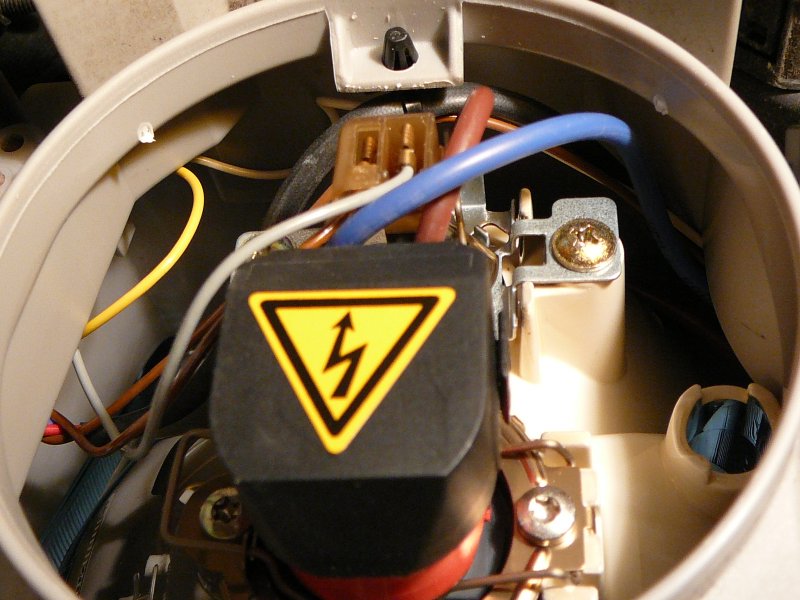 Notice large Blue and Brown from Ignition Module to Xenon Bulb |
PE8210P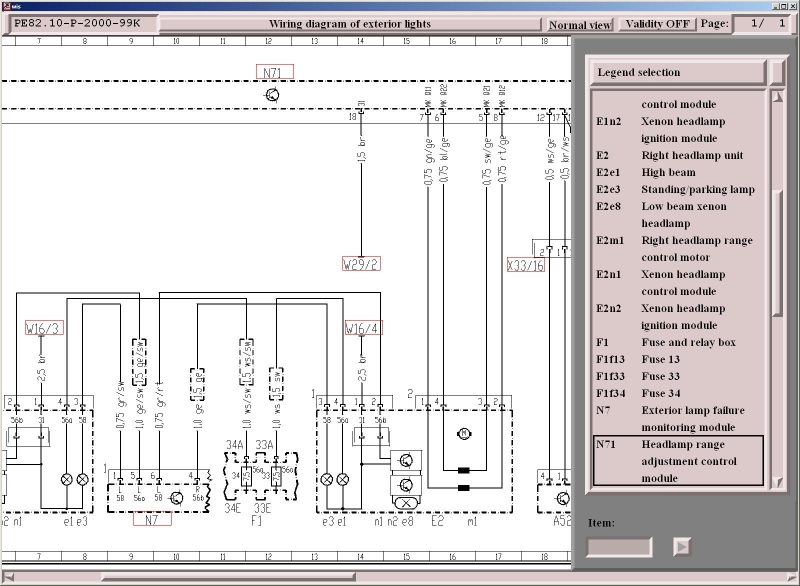 |
<===--- Wiring Diagram PE82.10-P-200-99K Note that the numbers of the Headlamp Unit do NOT match the pin number of the 4 pin main connector as listed in photo 443 |
|
PE8210U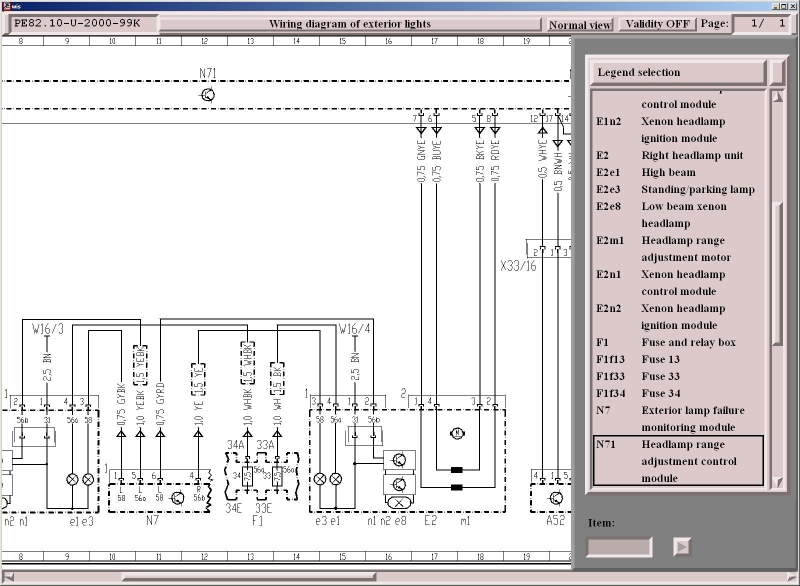 |
<===--- Wiring Diagram PE82.10-U-200-99K Note that the numbers of the Headlamp Unit do NOT match the pin number of the 4 pin main connector as listed in photo 443 |
|